
Laminated beechwood countertop/espresso bar
- Amelie
- Mar 16, 2021
- 5 min read
In December 2020, a baker whose sourdough I’ve long admired emailed me about building a sales counter and coffee bar for his new bakery. After about three weeks of non-committal back-and-forth, we agreed in January that he would install his own IKEA cabinetry, and I would build him a solid beechwood countertop (about 7m long) and matching pastry case (about 2m long), in a time frame of 4 to 6 weeks.
I tested positive for Covid-19 a couple of hours after I emailed the offer. This ignited a cascade of metaphorical flaming bags of dog shit, in which I felt I had no choice but to shower for the duration of both projects. But that’s a story for another time.
As soon as my quarantine was over, it was off to the races!
I had a SketchUp model of roughly-accurate countertop dimensions from the client, as well as his specifications: solid beechwood laminate, no finger joints, with cut-outs for sink and faucet, espresso machine cables and water lines, and garbage.
I spent my waking hours of Covid quarantine creating a workable design and cutting list. The client initially wanted a width of 85 cm, which I happily was able to change to 75 cm, saving about 100 euros in wood and glue and also the backs of countless future bakery employees (not to mention my own). I wanted/needed to be able to lift and maneuver each section of counter by myself. I settled on a design that would involve a two-part glue-up of five sections of countertop. These would connect to each other over the length of the counter via a sort of staggered butt joint situation, drawn tight with Clamex lamello biscuits (handy things!).
I bought raw steamed beechwood planks from our local retailer, Amsterdamsche Fijnhout. Rather than monopolize my shared workspace, I milled the lumber into 30 mm x 30 mm strips at the Openbare Werkplaats in Amsterdam Oost. I chose steamed beech for its comparative stability, and recommended edge grain orientation to my client over face grain, motivated by the substantial bowing in the face-grain laminated beech workbenches he’d already acquired.


Note: I do not recommend abusing your (or anyone's) Tesla in this way. Furthermore, hauling several hundred kilos of loose projectiles most definitely lowers the safety rating.

After planing, ripping, and thicknessing, I drove it back to our shop in West to glue up into packets of about 26 cm wide that varied in length from 135 to 180 cm.

Fun fact: How many total laminations are in this countertop? Somewhere around 120.

After the first glue-up, it would have made a heap of efficiency sense to send these planks through our 51-cm thicknesser to remove the glue and smooth them before the second glue-up. But for our thicknesser’s motor, which chose just that time to burn out. A new motor would take two weeks to arrive. I’d made special cauls to hold the laminations flat, and these had worked pretty darn well. So I scraped the glue, re-sawed the laminated planks to 25 cm wide, and glued these by threes into five final countertop sections of 75 cm wide.

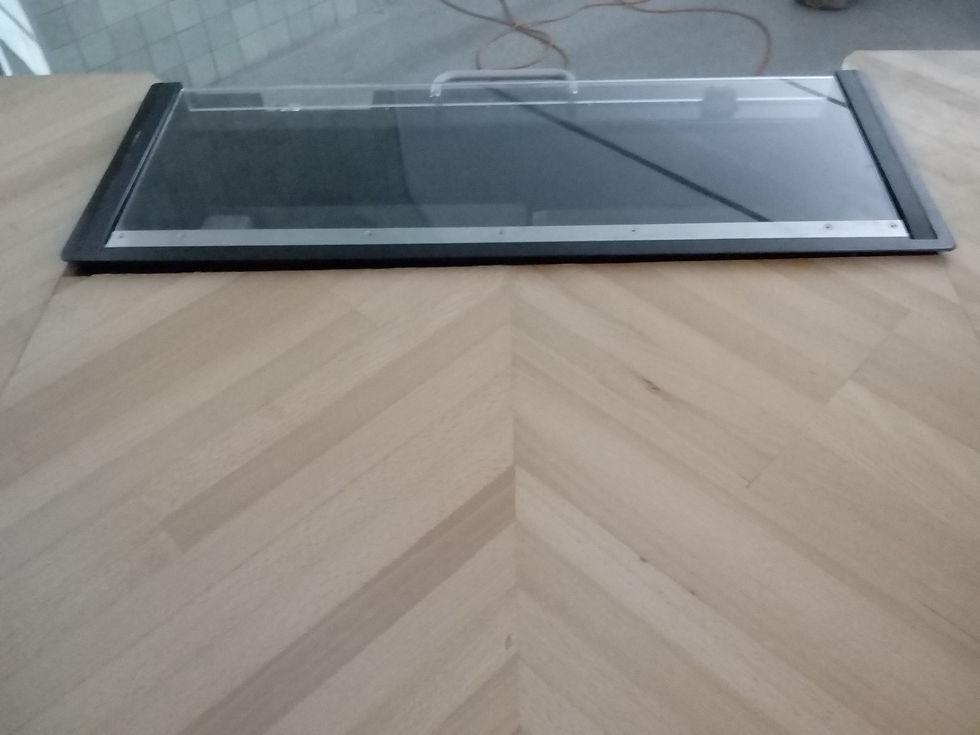
I next made a pattern and drilled/sawed/routed a hole for the client’s washbasin (countersunk 2 mm and later installed on-site with silicone caulk) and a hole for the faucet.

I toted the five sections of countertop upstairs, where I planed them flat by hand with a #4, working as carefully as possible across the grain. I followed planing with a card scraper, and sanded them by hand with 80- and 120 grit sandpapers. I chamfered all top edges "by hand and eye" with a spokeshave.


I pre-drilled holes for the front profiles and finished the counter with three coats of (foodsafe) Osmo TopOil on the tops and an oil-based clear matte varnish on the undersides (reasoning: compatible product, not visible, not necessary to be foodsafe, not enough Osmo to coat underside anyway).

Installation was a piecemeal affair, largely accomplished by light of trusty Petzl headlamp. Working on-site was more enjoyable than I’d expected, in the company of other sub-contractors and friends/relatives/indentured servants of the client. I was very glad to have my trusty homemade saw benches, along with all the tools I might possible need. I kept things simple, using L-brackets with large holes to allow for any residual movement in the countertop. I used flat steel strips on the undersides of the butt joints to pull adjoining sections of countertop even before gluing and Clamex-ing them together.
*Note: Since installation, client has opted to resurface and make other modifications to countertop. All photos except the last four in this post show countertop in the state in which it was fabricated and installed.*

Here's a photo showing a butt joint between two sections of counter before being pulled down with 40-cm steel strips on the underside of the counter. This photo shows the original rustic modern character of the countertop surface, plane scuff marks visible. It emerged post-installation that the client is no fan of rustic modern, and he has since sanded the chamfer and plane marks smooth and re-finished the countertop with an industrious and possibly record-breaking four coats of Osmo TopOil.

Once I’d installed the straight sections of countertop, I started the interesting business of the diagonal section spanning the gap between them. I first saw this section in its final, fixed state on the same day I installed the bulk of the counter. I noted that, in the enthusiasm of construction, angle symmetry appeared to have been a glancing afterthought.

This was okay. I trained in boatbuilding, and therefore am pretty good at making construction patterns for less-logical shapes. It was a good puzzle, albeit one that took me eight days to solve.

Happily, I had enough off-cut pieces from the existing countertop to piece together a diagonal "filler piece" that extended the existing lines of the countertop sections and brought the focal point to the center of the off-center bread slicer.


I routed separate holes for the coffee grounds waste disposal and espresso cables on-site. I will say that routing 31 mm-thick beechwood is a real treat if you are partial to the scent of campfire.

I also made a profile running the length of the customer side of the countertop that changes direction and frames the backsplash. After installation the client asked if I could make it look like the backsplash was mitered (it had been a lap, which worked well in the shop but less-well in reality... frankly, it was a hot mess sitting on top of a backsplash that wasn't square).
So I said, sure, why not.


Well, them's the nuts and bolts of this job. I give myself a 10/10 for blood, sweat, and tears and a 7,5/10 in technical execution. Exponential learning curve.
Amelieorate donated 167,5 fabrication hours and all design/consulting hours on this countertop.
STATS:
Design hours: 20-25, including diagonal section
Fabrication, from sourcing wood to packing for transport: 17 days in a row
Installation of all the above, plus on-site modifications by lamplight: 3,5 days


To be continued... with how I built that monstrous pastry case!


Comments